Tag Archives: birthday cake

Time for kick off

30 Dec

Andy's football cake

After a bit of a break doing many other things, here is the latest cake offering. This one was for Andy’s 25th, resplendent in the yellow and green of his beloved Norwich.

To begin with I baked a very large sponge in my new expandable cake tin set to its biggest. Then I simply iced with pre-coloured green fondant icing, including the board.

Next up, the icing – unfortunately I didn’t have the royal icing quite thick enough (I should have added a touch more icing sugar), but I’d started so I was going to finish! Having said that, I was pretty chuffed at my ability to ice in a straight line – which was probably the hardest part about this one.

After that I made a football out of white icing and drew the classic hexagons on with a black edible pen, made candle stands out of more white icing and little corner flags from red icing and cocktail sticks.

The final task was to locate the players – genuine Norwich Subbuteo men from the ’70s – don’t they look just spiffing?

Subbuteo men on the football cake pitch

And the final task? Blowing out the candles…

Candles lit

No, don’t worry, I haven’t forgotten it… this cake was pretty simple, so the Cake-O-Graph skill level line has plummeted quite significantly. But I do think it was also pretty effective so you can see that the quality line is flattening out…

Cake graph

Baking Burgers

15 Oct

fininshed burger cake

And so for cake number two: the burger. This one was for Debs’ birthday BBQ, and it seemed fitting to make a burger. This one was inspired by one of my mum’s many cake books.

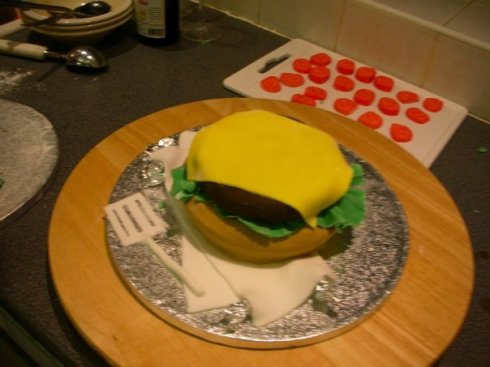
Now, time to begin. I was feeling confident – I’d made three thin, round sponges, and iced them with pale brown (for the bun) and dark brown (for the burger). This time I managed to get pre-coloured icing, which pretty much removed any chances of a speckled burger. I made some lovely lettuce using green icing, left to set on scrumpled up tin foil to give it that wrinkly effect; some tomato slices with dark and light red icing, a cheese slice and some accessories. These were a spatula (effectively glued to the board as it was a rather delicate affair and fell apart on tra) and a napkin, which was given ‘realistic’ folds by wedging tin foil underneath the corners.

Let the layering commence!

Napkin, bun, lettuce, burger, cheese slice. Note the army of tomatoes preparing for assembly.

burger cake with cheese slice

Next to add the mayo (just royal icing tinted beige). This was actually a really useful glue throughout the whole process, so there’s a layer of mayo at every stage – just not always this much!

And then another layer of lettuce and the tomatoes (something you would not find on any of my real burgers)…

Finally the bun ‘lid’ was added on top (this was another sponge covered in icing), I used my spare extra tomatoes for the candle holders, decorated the napkin and painted the spatula silver…

And for one last finishing touch – no burger is really a burger unless it’s in a sesame seed bun…

There you have it, I’d say it looks good enough to eat!!